Cannabis How-Tos
How to Roll a Joint in Five Simple Steps
Learn pro tips for rolling your own great-looking, smooth-burning joints.
Published on September 20, 2019 | Last updated September 4, 2024
The idea of rolling a joint can feel daunting, especially if you’re used to smoking perfect pre-rolls or favour other, seemingly simpler methods of consumption. But with a little guidance, the right tools and a lot of practice, you can roll joints that look great and burn beautifully.
Things you need
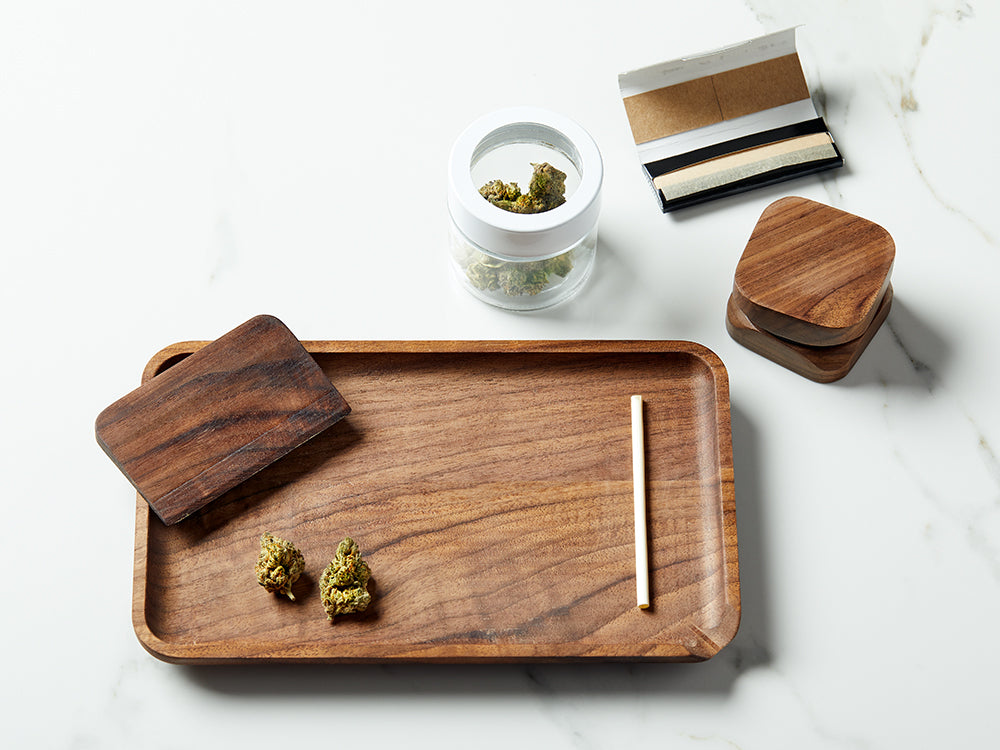
To roll a joint, you need three things:
- Dried flower: Any dried cannabis flower can be ground and rolled into a joint. If you prefer, choose pre-milled cannabis and skip the grinding step.
- A grinder: A good quality grinder — steel is better than plastic — will create a uniform consistency, which is key to rolling smooth, even-burning joints.
- Rolling papers: Rolling papers come in a variety of different formats (organic, unbleached raw, rice or hemp paper) and sizes (double wide, king or slim). Likewise, joints can be rolled into many different shapes. For this tutorial, we suggest standard, straight rectangular papers, which provide the same amount of dried flower all the way to the end of the cylinder.
Optional supplies:
- Filters or tips: A filter prevents the dried flower from escaping into your mouth when you inhale and protects your fingers from being burned. Some rolling papers come with premade tips, but you can make your own by rolling up a small rectangle of cardboard or heavy paper.
- Tamping tool: A pen, pencil or special cannabis tamper can be useful for pushing cannabis down through the open (un-filtered) end of a joint before twisting the paper and finishing the job.
Follow these five simple steps to rolling a joint
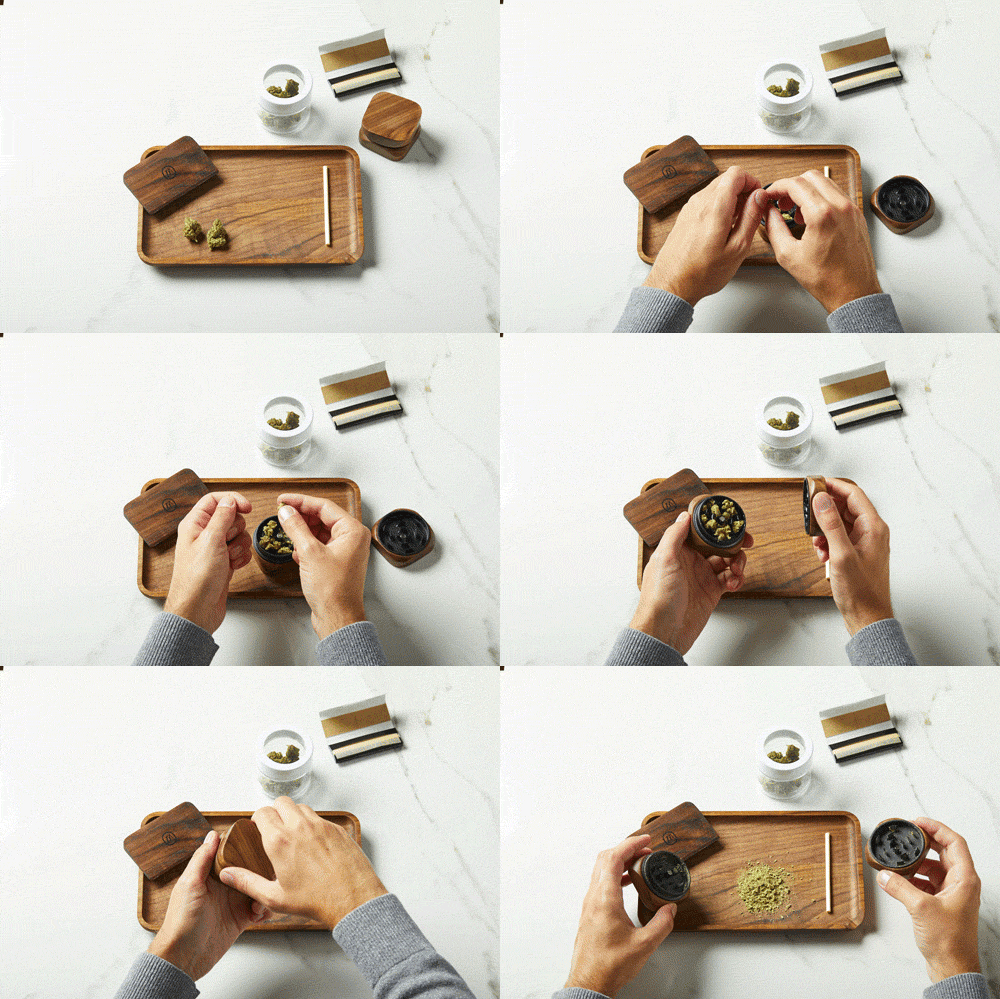
Gather your supplies and get ready to roll! Here’s how:
1. Grind the cannabis flower
Place the flower in the grinder, being careful to space it out so it doesn’t clump. Do not overfill. Follow your grinder’s instructions to start milling your cannabis (typically, this involves holding the bottom half of the grinder in one hand while rotating the lid, but models can vary.) Keep grinding until the cannabis is milled into small, uniform pieces, but not powdery.
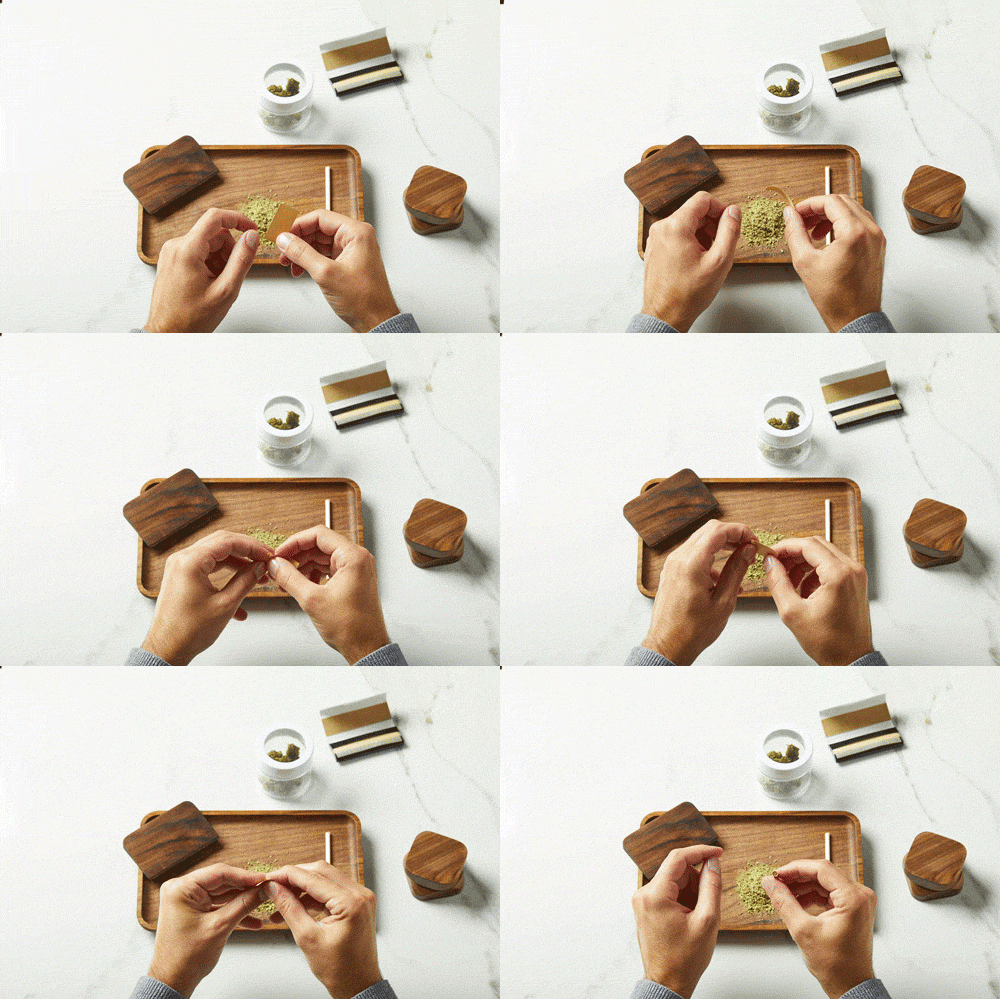
2. Make a filter
If you plan to make a filter, take a rectangle of cardboard or heavy paper and fold one end like an accordion into a “w” shape, then curl the rest of the paper around it. Alternatively, roll the entire rectangle into a little spiral.
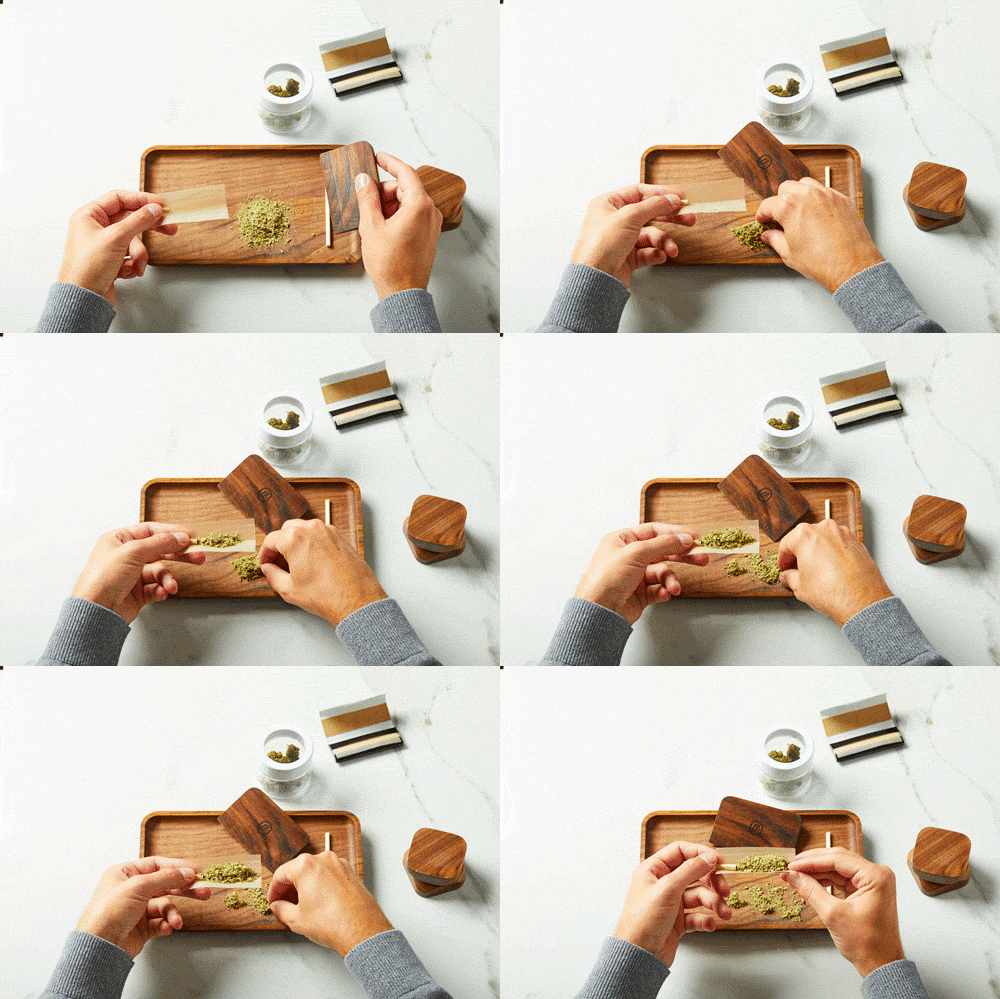
3. Fill the rolling paper
Place a rolling paper horizontally on a flat surface, with the shiny, glue strip farthest away from you and facing up. If you’re using a filter, place it in the paper at the far right or left end. If you’d like, you can lightly moisten the filter to help it stick to the paper. Now, sprinkle ground cannabis onto the paper, trying to place it evenly across its length, leaving a bit of empty space on the end opposite the filter. Do not overfill — the glue strip at the top should be visible.
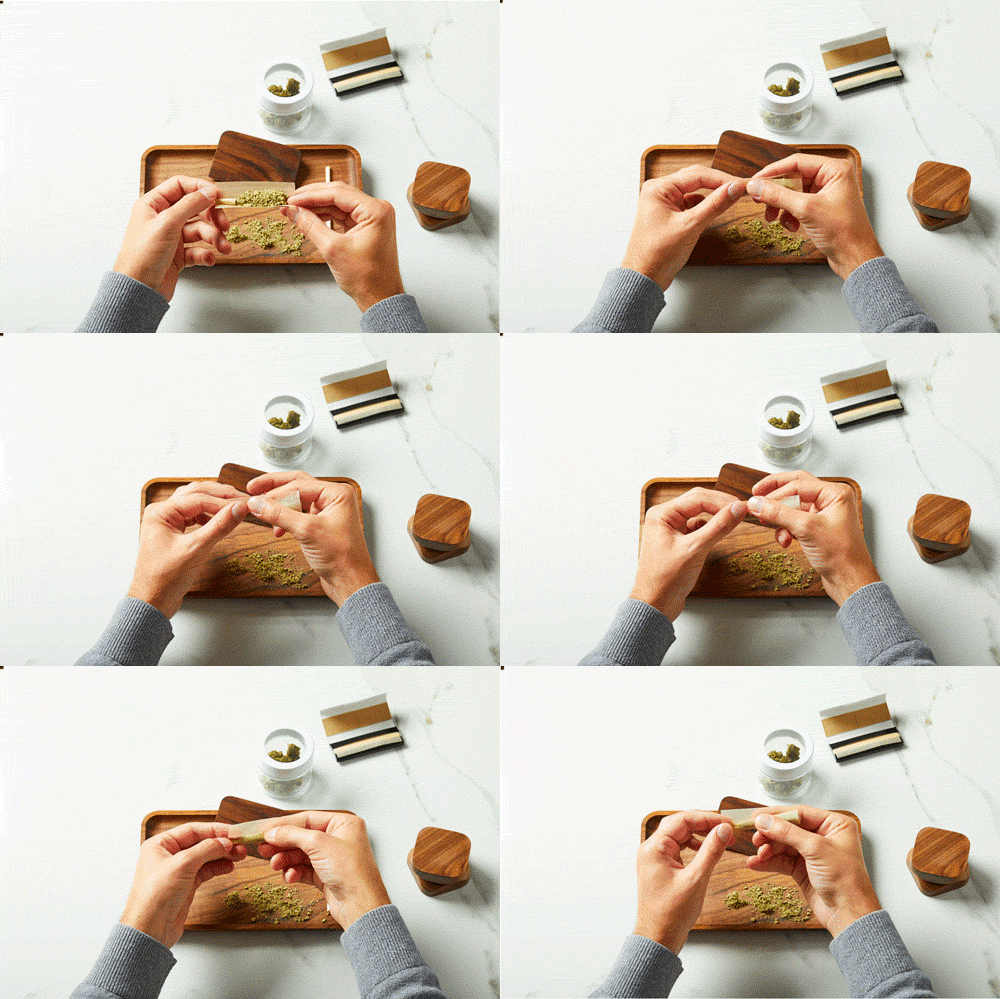
4. Pack the cannabis
To pack and pre-shape the dried flower into a cylinder, fold the bottom, unglued long side of the paper lengthwise up and around the cannabis, but don’t roll the joint just yet. Place your index fingers behind the top end of the paper and your thumbs at the bottom and pick the joint up. Use your thumbs to roll the cannabis up and down until it is well-packed, evenly distributed, and forms a cylinder. Keep doing this until you feel the joint is in good shape—getting it into shape now will prevent gaps and make the next, final step easier.
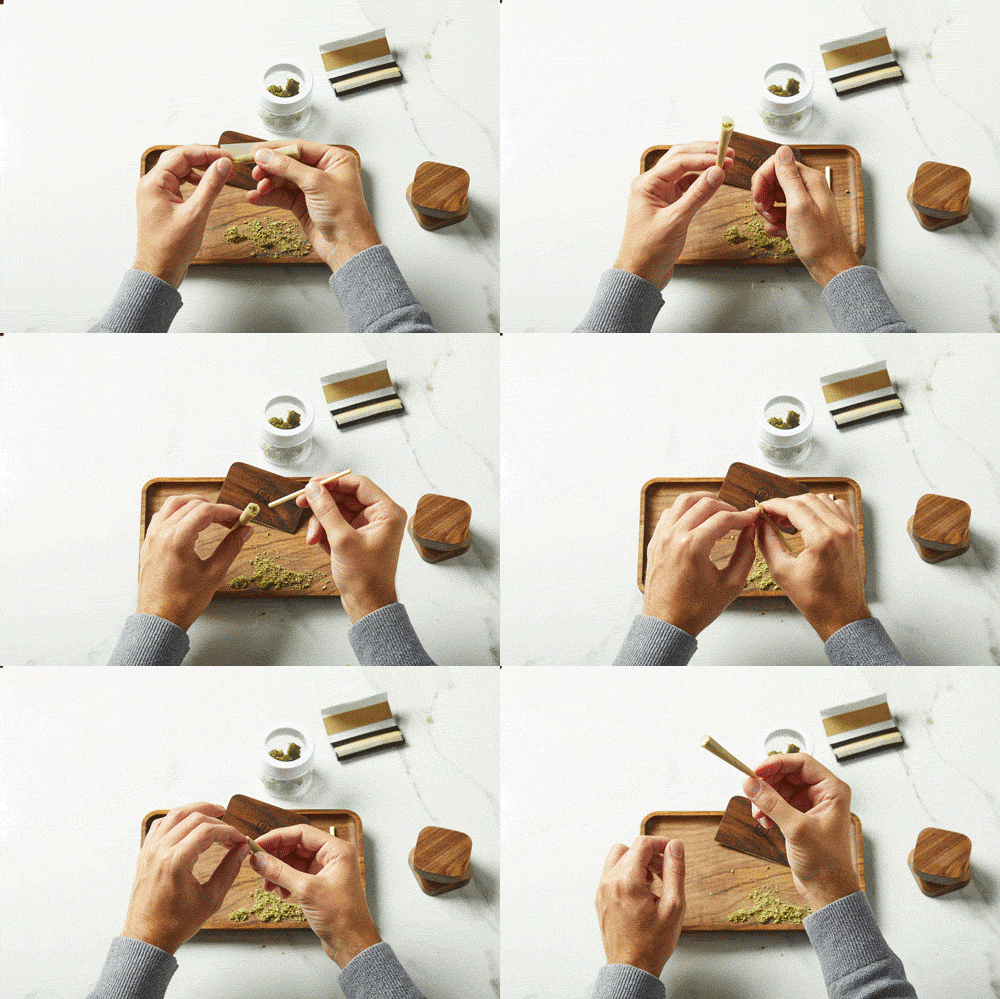
5. Roll it Up
Tuck the bottom, unglued edge around the packed cannabis and roll the paper up tightly to secure the cannabis and filter. This can be achieved with a rolling or folding motion or a combination of the two. Moisten the glue strip and press it onto the paper. At this point, you can use a small tool like a pen to poke into the open end and tamp down the cannabis so it’s tightly (but not too tightly!) packed. Gently fold and twist the open end to close it and prevent spillage.
That’s it! You did it yourself and you will only get better with practice.
How to use a joint roller
If you're still struggling with rolling a joint after multiple tries, don't worry — there are other ways to get the job done. A joint roller is an affordable tool that helps roll perfectly shaped joints every time. Here's how to use one:
1. Open the joint roller
Start by opening up your joint roller and laying it flat on a table or any flat surface. The roller should have a metal or plastic frame with two arms that you can open and close.
2. Lay the paper inside
Take your rolling paper and lay it flat inside the roller, positioning it evenly between the arms of the roller. The glue side of the paper should face up towards you.
3. Add cannabis
Evenly grind your desired amount of dried cannabis flower and place it along the crease in the roller. Make sure to distribute it evenly so that your joint burns well.
4. Close and roll
Close the roller arms together and start rolling them towards you, using your thumbs to guide the paper into the roller. Continue rolling until just a small part of the paper is sticking out of the roller.
5. Moisten and seal
Once the roll is to your liking, moisten the glue side of the paper and then close the roller to seal your joint. Wait a few seconds for the glue to dry before opening the roller.
Congratulations! You've now successfully rolled a perfect joint using a joint roller.
Joint rolling FAQs
How much cannabis do I put in a joint?
Wondering how much weed to put in a joint? Starting with lower-THC cannabis and rolling it into robust, medium-sized joints (and not smoking the whole thing if you don't' need to) can help you learn your tolerance and keep safe. As you become more comfortable and skilled in rolling joints, you can gradually increase the potency or amount used based on your preferences.
What if I mess up?
Mistakes happen, especially when you're learning. Keep a spare roll of paper handy so you can start over if needed. You can also use the glue strips from extra papers to patch up small tears.
How do I store my rolling papers?
Keep your rolling papers in a cool, dry place. Moisture can make them sticky and difficult, if not impossible, to use.
With all these tips, you’ll be rolling perfect joints in no time! Meanwhile, if this sounds too tricky or time-consuming, you can purchase conveniently pre-rolled joints, or pre-rolls, through Authorized Retailers and OCS.ca.


